PromptPay


ในบทความที่แล้วเราได้ทําความรู้จักกับ ESP8266 กันแล้ว ในบทความนี้เราจะมาพูดถึงวิธีการใช้งาน ESP8266 ด้วย Arduino IDE โดยจะใช้ ภาษา c/c++ ในการเขียนโปรแกรม
ผมจะยกตัวอย่างการเพิ่มบอร์ด ESP8266 ใน Arduno IED และการเขียนโปรแกรมไฟกระพริบ โดยเครื่องมือที่ต้องใช้คือ
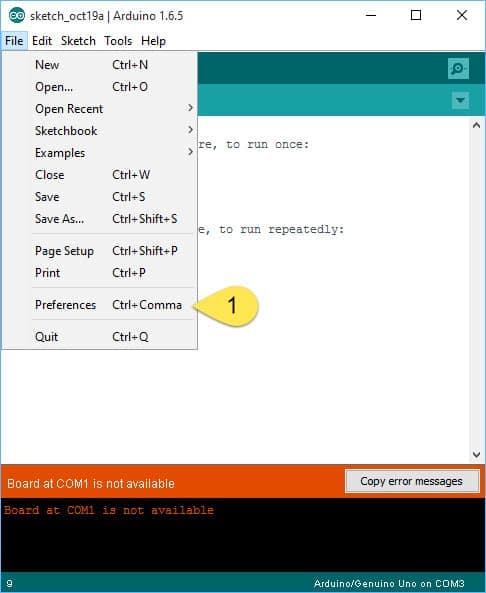
เริ่มแรกเปิดโปรแกรม Arduino IED และเลือกเมนู File—>Preferenes
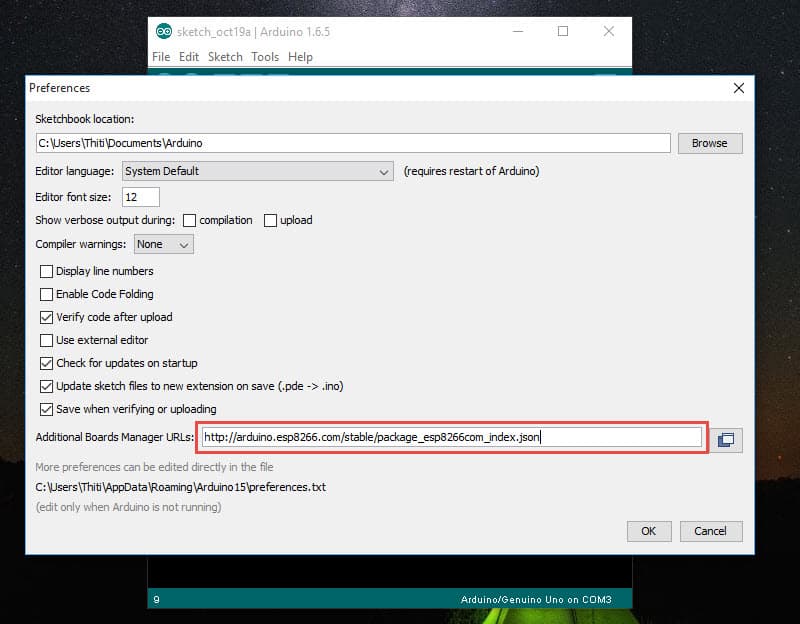
blink-led ในหน้าต่าง Preferences หัวข้อ additional Boards Manager URLs: ให้ใส่ “http://arduino.esp8266.com/stable/package\_esp8266com\_index.json” แล้วกดปุ่ม “ตกลง” ตามรูปด้านล่าง
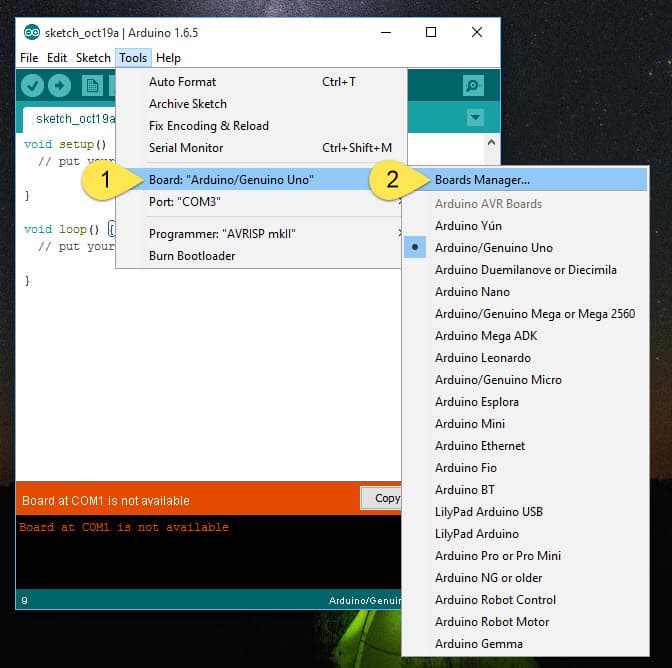
blink-led เลือกเมนู Tools—>Board:“xxxxx”—>Boards Manager…
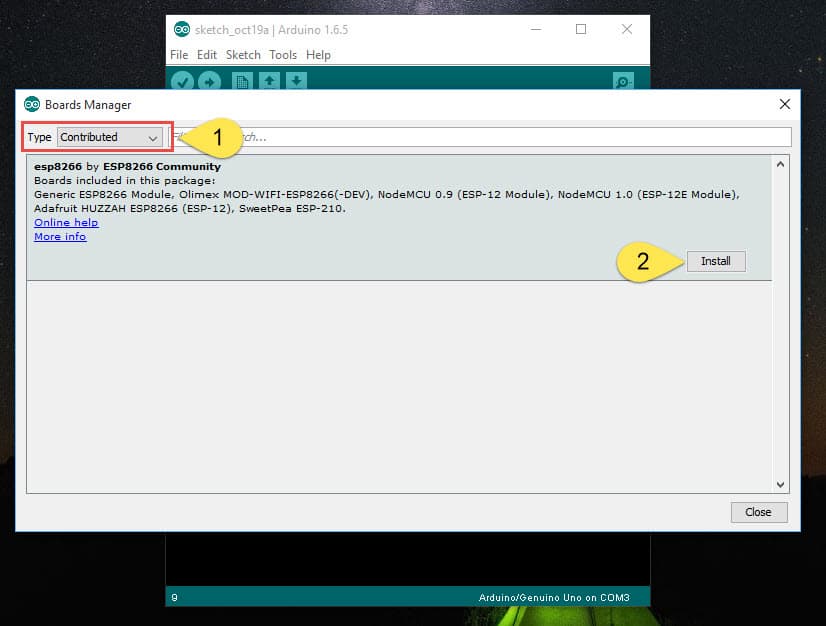
blink-led ในหน้าต่าง Boards Manager เลือก Type เป็น Contributed(หมายเลข 1) แล้วกด install esp8266 by ESP8266 Community
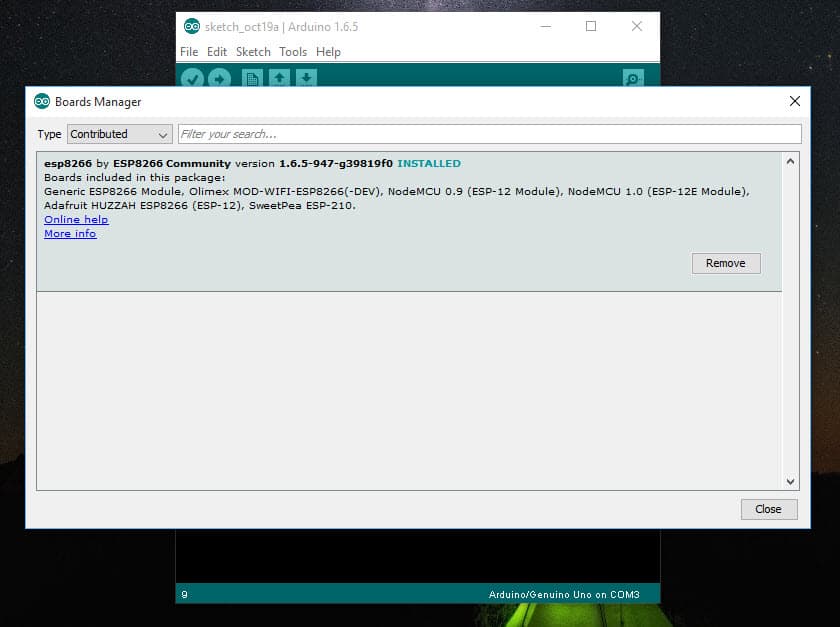
blink-led รอจนติดตั้งเสร็จสิ้น
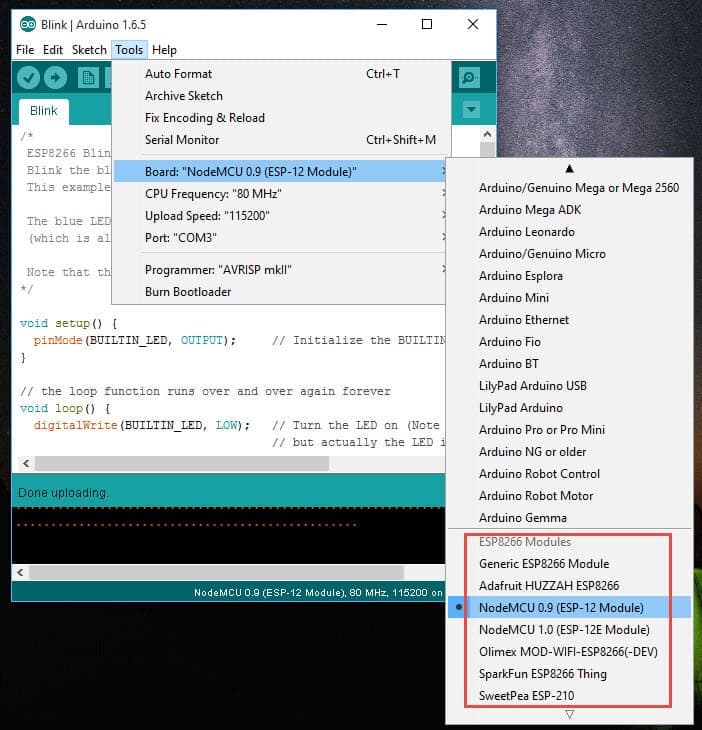
blink-led ปิดโปรแกรม Arduino IDE แล้วเปิดขึ้นมาใหม่ จะเห็นวามี Board ESP8266 เพิ่มขึ้นมา ให้เลือกตาม Board ที่เราต้องการใช้งาน
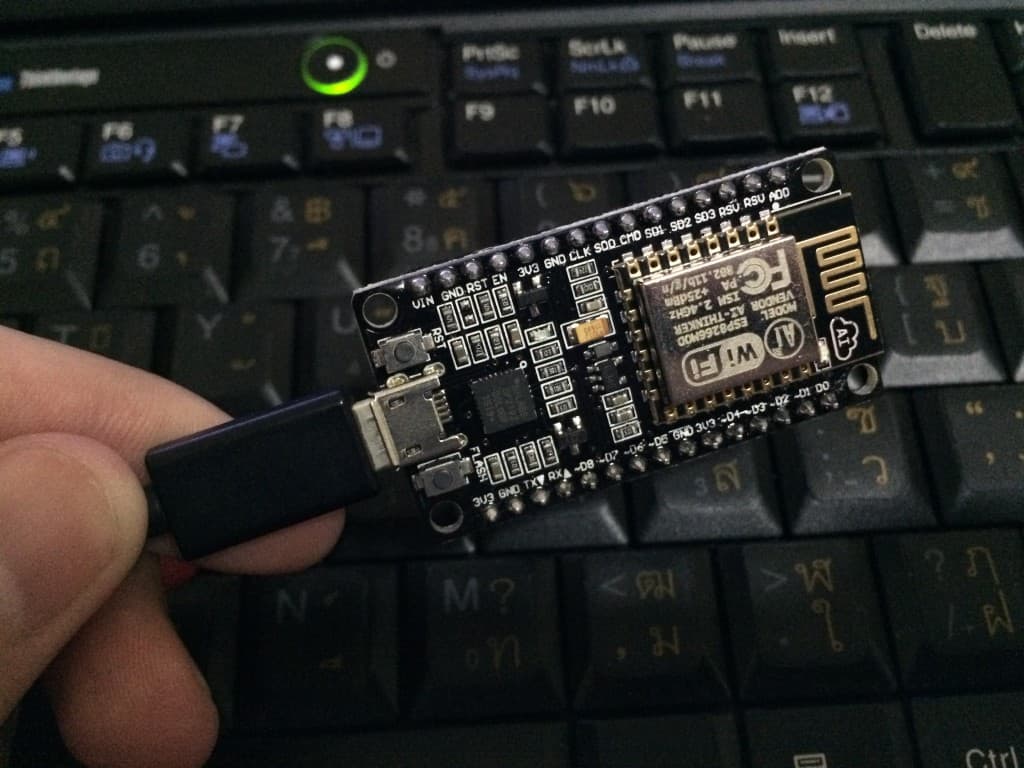
blink-led เสร็จสิ้นการติดตั้ง Board ESP8266 ต่อมาเรามาเขียนโปรแกรมแรกกัน คือโปรแกรม ไฟกระพริบ(Blink LED) เริ่มแรก เสียบ NodeMcu เข้ากับ Computer
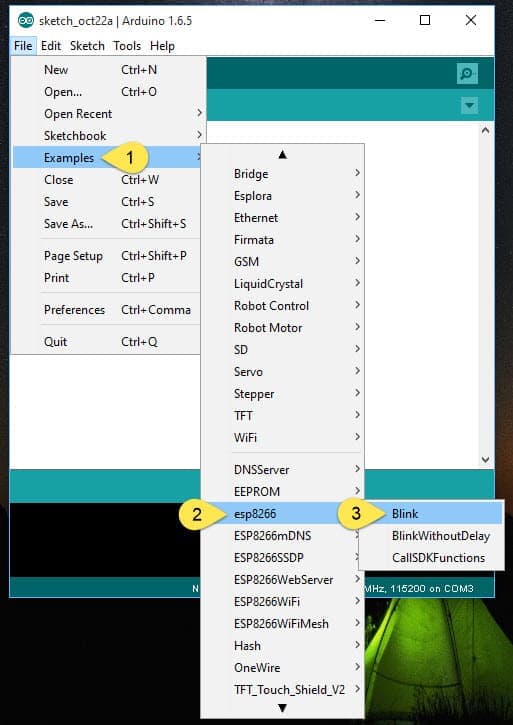
blink-led เข้าโปรแกรม Arduino IDE แล้วเปิดตัวอย่างโปรแกรมโดยเข้าที่ File—>Examples—>esp8266—>Blink
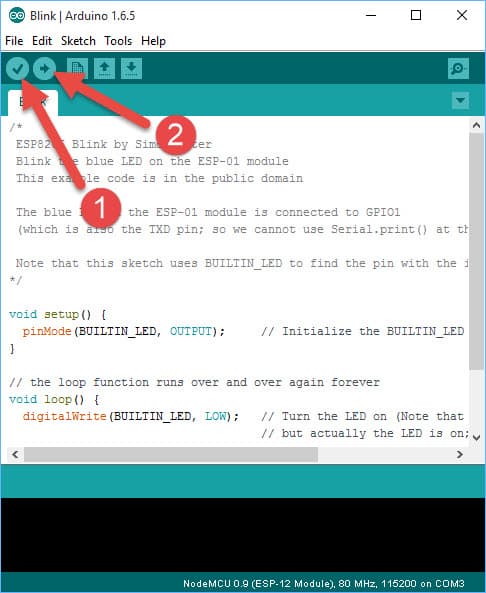
blink-led จะพบกับตัวอย่าง Code ให้เรา compile(หมายเลข 1) แล้วโปรแกรมลง ESP8266(หมายเลข 2) ได้เลยครับ
blink-led เมื่อโปรแกรมลง ESP8266 เสร็จแล้ว ไฟ LED บน board จะกระพริบ ดูวีดีโอตัวอย่างผลลัพธ์
สวัสดีครับบนความนี้เราจะมาสร้าง 18650 battery pack 12V กันครับ สําหรับ 18650 battery pack 12V ก็คือ Battery ชนิดหนึ่งที่ทํามาจาก 18650 Battery แบบนี้ มาต่อรวมๆกันหลายๆก้อน เป็น Battery ลูกใหญ่
หลังจากที่มีโครงการซื้อ-จองล่วงหน้าสลากกินแบ่งรัฐบาลเป็นรูปแบบการจัดสรรสลากกินแบ่งรัฐบาล ที่เปิดให้ซื้อ-จองผ่านช่องทางต่าง ๆ ของ ธนาคารกรุงไทย โดยการจองซื้อสลากสามารถทำได้ ทำได้ 3 ช่องทาง ช่องทางแรกคือไปพบพนักงานที่ธนาคารกรุงไทยเลย ช่องทางที่สองคือผ่านเครื่อง ATM ของธนาคารกรุงไทย ซึ่งมี ATM ที่รองรับ 9000 เครื่องทั่วประเทศ และช่องทางที่สามคือ internet banking เมื่อเกิดโครงการนี้ขึ้นมา ปัญหาที่เกิดขึ้นคือ มีคนจํานวนไม่น้อยที่ไม่สามารถจองหรือซื้อสลากกินแบ่งรัฐบาลได้ เนื่องจากมีคนเข้าทํารายการจองหรือซื้อสลากกินแบ่งรัฐบาลเป็นจํานวนมาก (ช่วงแรกระบบถึงกับล่มเลยทีเดียว)
สวัสดีครับ ในบทความนี้ก็เป็น EP.4 แล้วนะครับ โดยเนื้อหาจะเป็นเรื่องเกี่ยวกับ Syntax ของภาษา Go ว่าภาษา Go มีรูปแบบการเขียนเป็นอย่างไร แต่ละคําสั่งใช้อย่างไรสําหรับท่านใดที่ยังไม่ได้อ่าน EP.3 ท่านสามารถกลับไปอ่านก่อนได้นะครับที่นี่ Go EP.3 Go packages คืออะไรมาเริ่มเรียนรู้ไปด้วยกันตามหัวข้อด้านล่างเลยครับ